
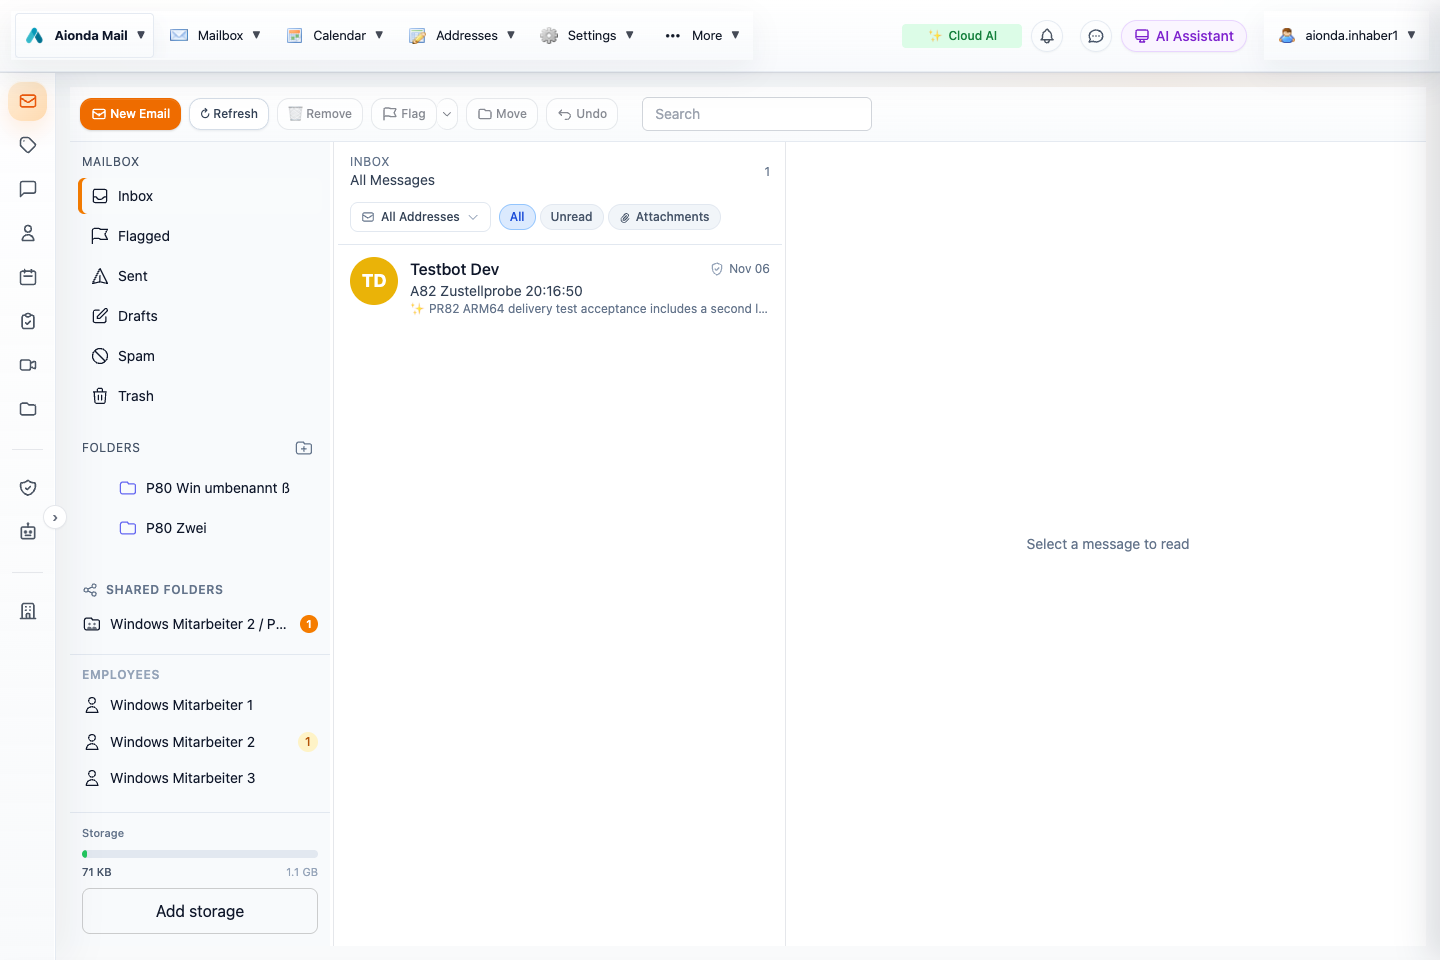
- Choose a folder before comparing counts or searching.
- Compose a new message.
- Select a message to read it.
Select the screenshot to open the full-size image.
Read and inspect
Select a folder, then a message. Expand the header to inspect the sender, To and Cc fields rather than relying only on the display name. Bcc recipients are normally absent from delivered message headers: receiving a message does not guarantee that your address appears in To or Cc. Delivery information and the original headers can help explain which address received it.
Compose and reply
- Choose New email, Reply, Reply all or Forward.
- Check the From address and every recipient. Reply all can include people beyond the original sender.
- Write a subject and message, then add attachments if required. Review AI-generated text before using it.
- Send and check Sent. If sending fails, keep the draft and inspect the error before retrying to avoid duplicate messages.
Organize
Create folders for projects or topics. Expand or collapse folder branches to reduce clutter. Select messages to move, delete, flag or mark as read. Deleting to Trash differs from permanent deletion. Folder sharing is an explicit permission grant; a colleague appearing in Contacts does not give them access to your mailbox.
Search and flagged mail
Use search and the available filters to narrow the current view. Check the selected folder and search scope before comparing results with Tasks → Flagged email. A folder-specific result is not the same population as all flagged messages. Loading more rows is a presentation detail, not a reliable way to count the entire mailbox.
Multiple clients
Connected clients receive change notifications and refresh affected data after new mail, moves or deletions. An offline or suspended app catches up when it reconnects. If another device looks stale, check connectivity and refresh before repeating the action.
Actions while reading an email
Open a message, then use the buttons below its header. The main mailbox toolbar can act on selected messages; the reading-pane controls act on the email you have opened. On smaller screens, additional actions move into More (…) or the bottom action bar.
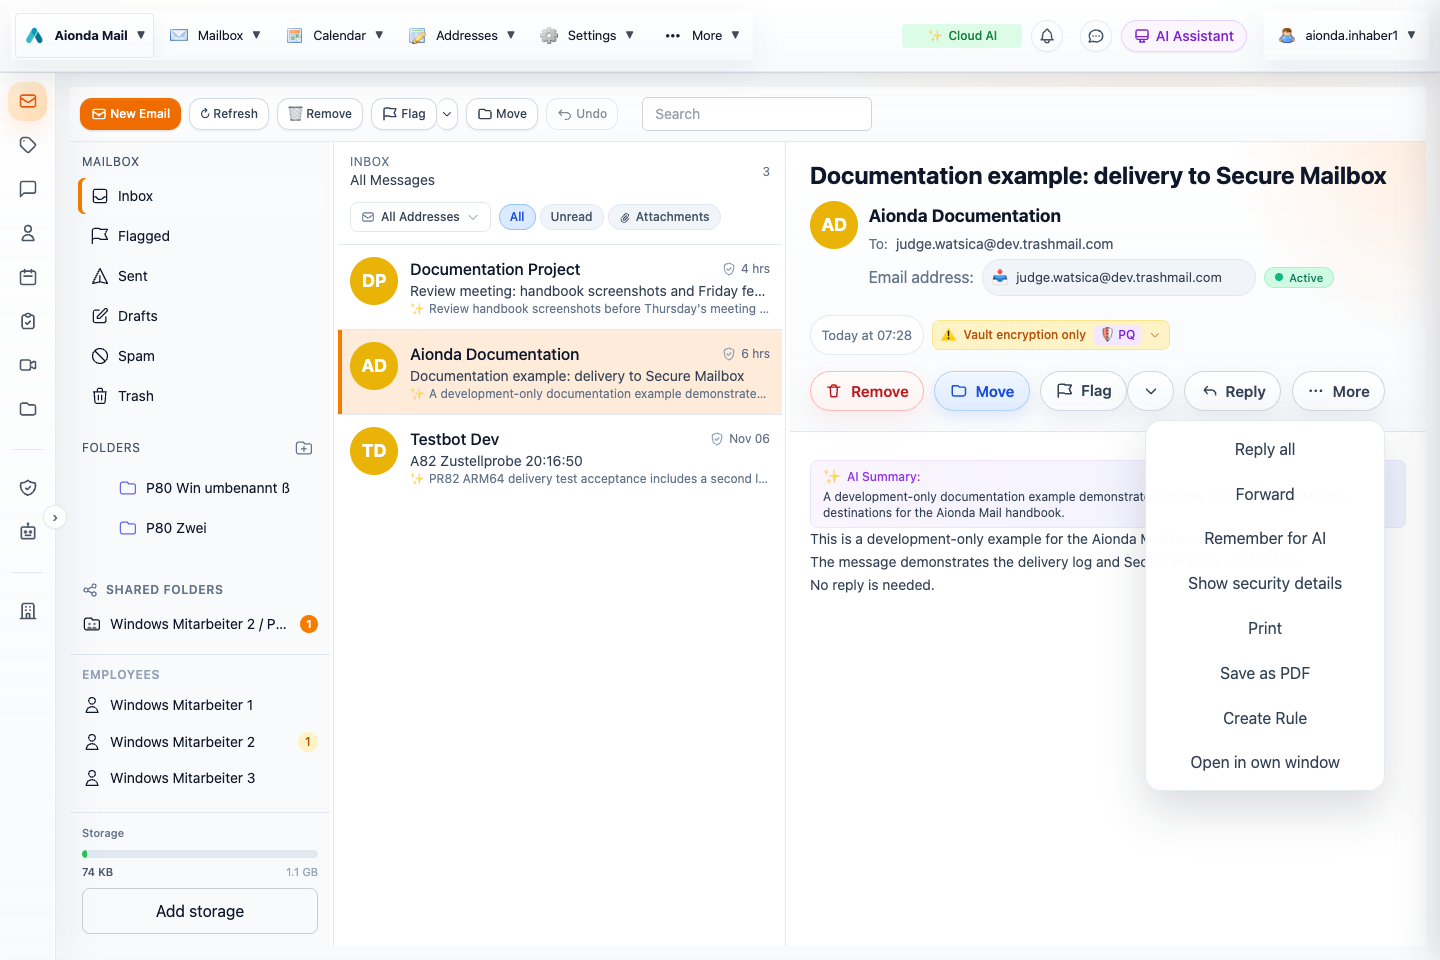
- Main actions for this email.
- More opens the additional actions.
- Print and Save as PDF are in this menu.
Select the screenshot to open the full-size image.
| Action | What happens / what to check |
|---|---|
| Reply | Open a reply draft. Check the recipient and sending address before sending. |
| More → Reply all | Include the reply recipients from the original message. Review To and Cc so you do not send a private response to a whole group. |
| More → Forward | Prepare the email for another recipient. Review the quoted content and attachments before sharing. |
| Move | Choose the destination folder. Moving a message removes it from its previous folder; it does not delete its content. |
| Remove / Delete | Remove the selected email through the mailbox deletion flow. Review the confirmation and current folder: moving to Trash and deleting permanently are different operations. |
| Flag and its arrow | Flag or unflag the message; use the adjacent arrow to choose a color. See the illustrated color guide below. |
| More → Remember for AI | Make the email available to the assistant’s remembered-email feature. The action changes to Remove from AI when already remembered. This is separate from a colored flag; review AI processing settings. |
| More → Show security details | Open the same encryption-route dialog as the security badge. See the route diagram below. |
| More → Print | Open the printable email view and the browser/system print workflow. Select a printer, check the preview, then confirm or cancel. |
| More → Save as PDF | Open the print dialog, choose Save as PDF as the destination, then choose a file name and save. Check the preview first. A downloaded PDF is a separate copy outside the encrypted mailbox. |
| More → Create Rule | Start a rule based on this email. Check its conditions, action and scope before saving; see Rules. |
| More → Open in own window | Read the email in a separate window, where supported. If nothing opens, check the browser’s popup permission. |
Sender, recipient and address actions
Click the sender’s name to open Sender options: add the sender to Contacts, copy the email address, or compose a new message to that address. Check the full address before adding it. The receiving-address chip lets you copy the address; its address menu also opens it in Address Manager. Original To/Cc information and the delivery address answer different questions, especially for forwarded mail or Bcc delivery.
Attachments, remote images and the message view
Use an attachment’s download control to save it. Preview behavior depends on file type and browser support. Only open files you expected. If a remote-images notice appears, loading those images can contact the sender’s server; choose deliberately. When available, the per-email display controls let you choose Light, Dark or System. If a sender’s HTML has poor contrast, try Light; this changes presentation, not the original message. Use the offered translation controls when needed and compare with the original for important details. PGP messages can offer signature/key information and key-import actions; see the PGP chapter. An AI summary is generated assistance, not a replacement for the original content.
Use colored flags
- Open the message and click the arrow next to Flag.
- Choose Red, Orange, Yellow, Green, Blue, Purple or Grey.
- Use the main Flag button to remove a flag when it is no longer needed.
- Open Flagged or the relevant task/filter view to find marked mail again. Check the folder scope when comparing counts.
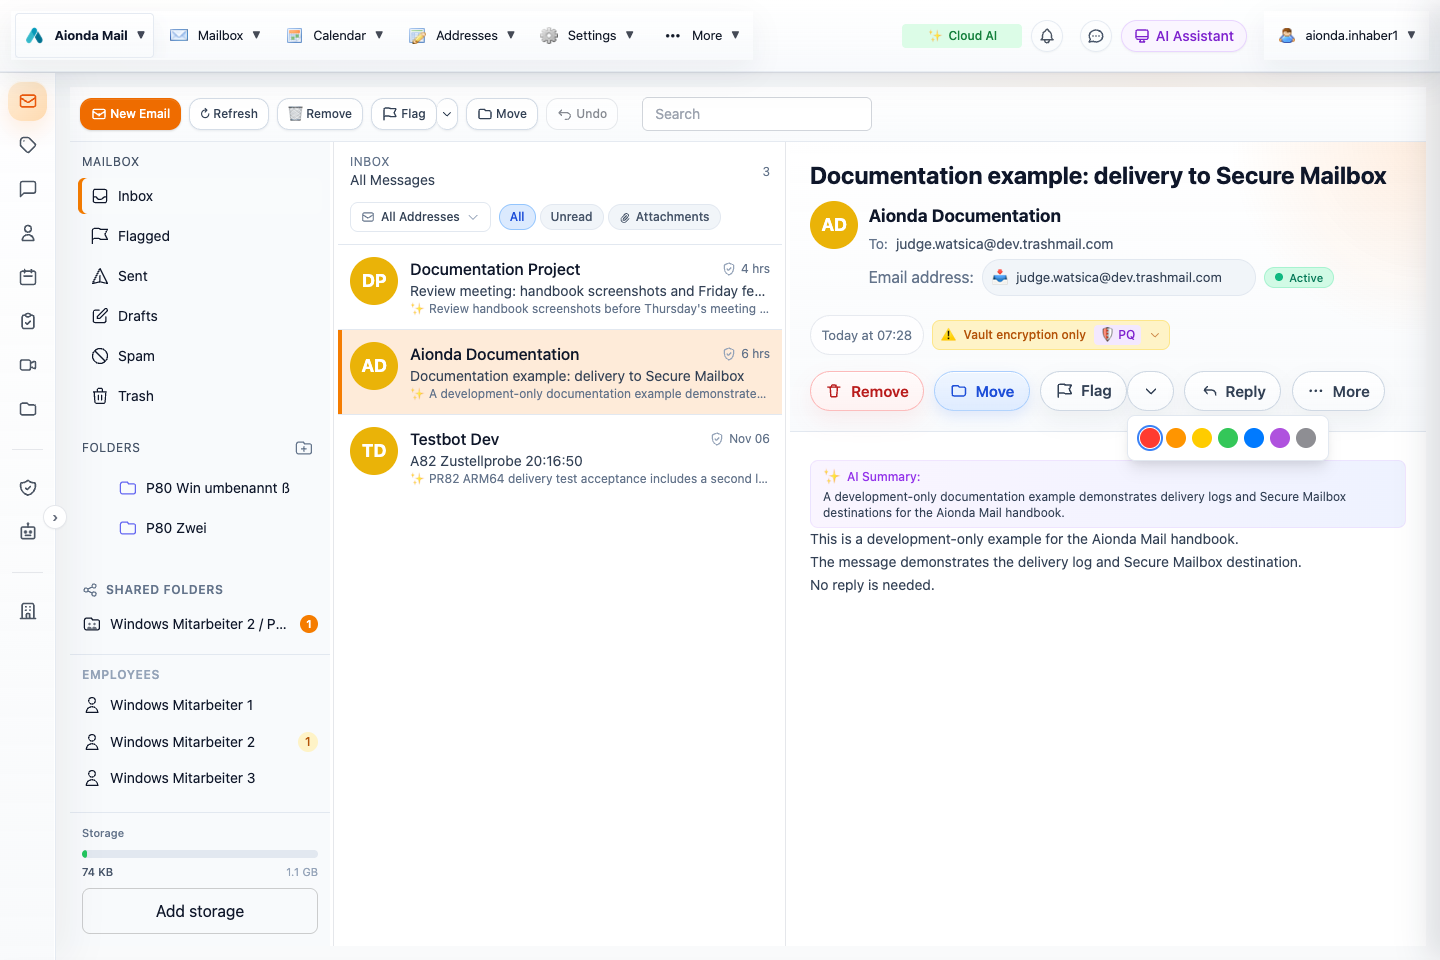
- Open the arrow beside Flag.
- Choose one of the seven colors.
Select the screenshot to open the full-size image.
Colors are organizational labels you choose, not spam verdicts or security ratings. For example, you could use red for a reply needed and blue for reference material. Agree on meanings with your team instead of assuming that the application assigns one. A message has one selected flag color at a time.
Open the encryption / PQ route diagram
- Open an email.
- Below the sender and delivery information, click its security badge, for example Vault encryption only with the PQ label. In German this is “Nur Vault-Verschlüsselung”.
- Alternatively choose More → Show security details. On a small screen the badge may be hidden; use this More-menu action.
- Read the arrows and the transport status, then close the dialog using its ×.
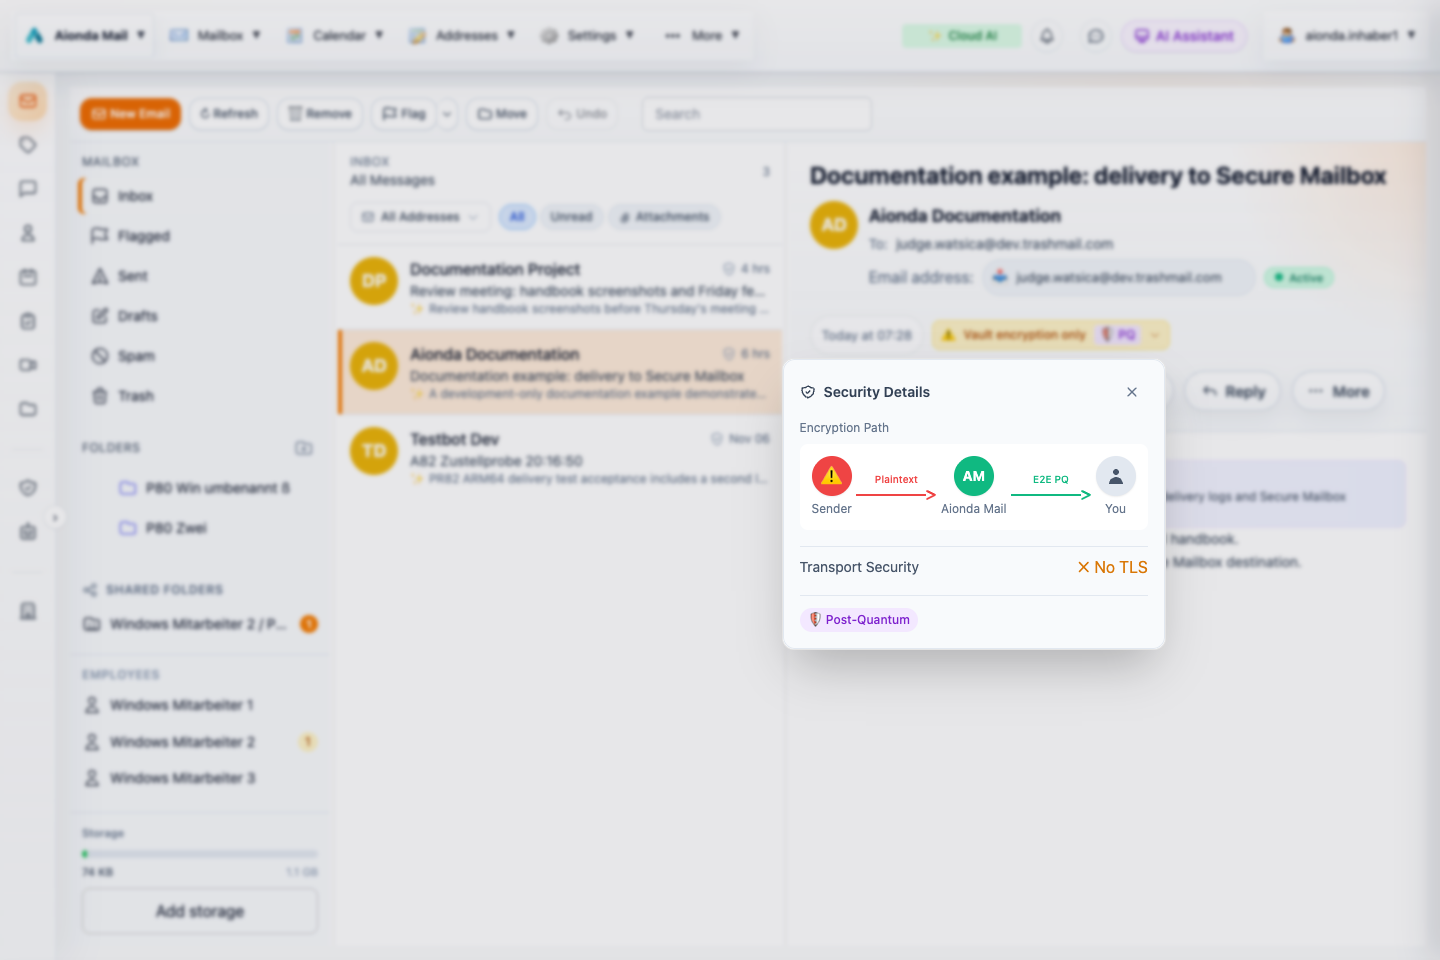
- Sender-to-Aionda protection for this test message.
- The encrypted mailbox path to you.
- Transport status and PQ mailbox protection.
- Close the dialog.
Select the screenshot to open the full-size image.
Read the diagram from left to right: Sender → Aionda Mail → You. The first segment describes the detected protection before Aionda received the email; the second represents the encrypted mailbox path. In this deliberately unencrypted Dev test delivery, the first arrow says Plaintext, while the mailbox arrow says E2E PQ. This is an example of a particular message, not a statement that all incoming Aionda mail arrives without TLS.
Vault encryption only does not mean the mailbox copy is unencrypted. It means you must distinguish that mailbox protection from the sender’s delivery protection. TLS and PGP, when detected, change the information shown. The diagram summarizes header-derived information; it is not a verified trace of every Internet hop. If headers are incomplete, the current UI conservatively does not credit TLS: that alone cannot prove that every prior connection was unencrypted.
For the meaning of missing SPF, failed DKIM, DMARC and unencrypted transport, read Understand sender checks and transport security. These are different checks: an encrypted email can still be phishing, and a missing authentication result alone does not prove fraud.