

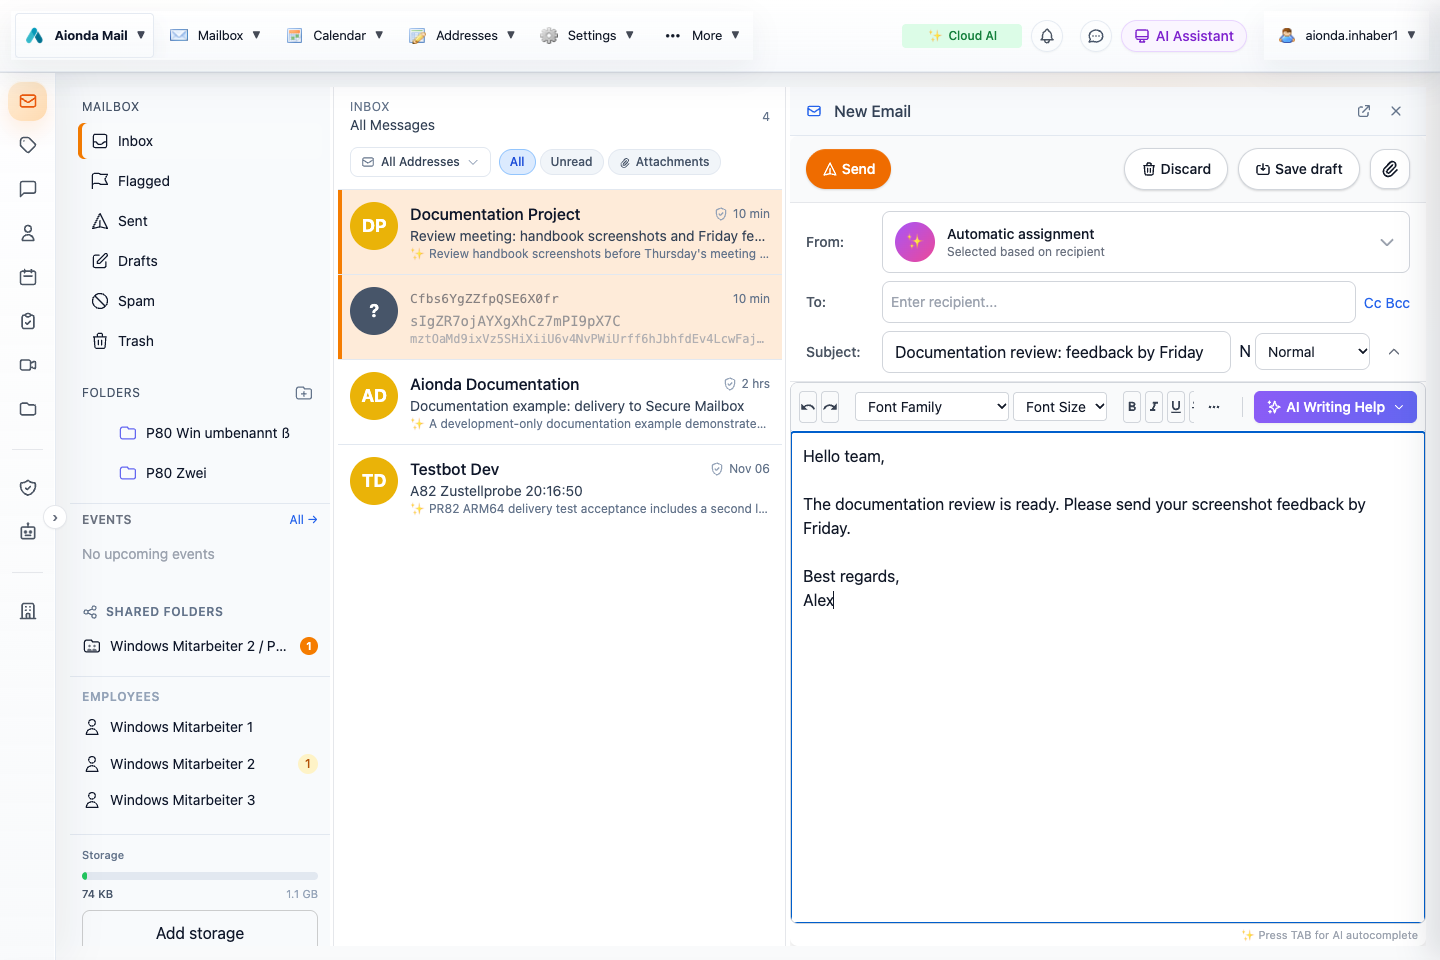
- Review the sender, To/Cc/Bcc recipients, subject and priority.
- Format your message or open AI Writing Help.
- Send, discard, save a draft or attach a file. This example remains an unsent test draft.
Select the screenshot to open the full-size image.
Start a new email, reply or forward
Open Mailbox and choose New Email. For a reply, open the original message and choose Reply; use the message’s additional actions for other reply or forwarding options. Sending, replying and forwarding require the applicable Plus entitlement. If you see the upgrade dialog, the sending capability is not enabled for the current account.
Choose the sender
Open From and select the address you want the recipient to see. The picker lets you search your addresses and offers automatic assignment based on the recipient, as well as creation of a new address where available. Check the final sender identity before sending; it affects where replies arrive.
What does “Automatic assignment” mean?
With Automatic assignment selected in From, Aionda chooses your sending address based on the recipient instead of asking you to pick one manually. This helps you keep using the same address for the same contact.
- Enter the recipient in To. The automatic lookup uses the first recipient in that field.
- If a remembered address is available, Aionda selects the sender address previously associated with that recipient.
- If no usable association is found, Aionda shows a preview of a new disposable email address (DEA). The address is created when you choose Send, not merely when the preview appears. Its name and domain follow your address-generation settings.
After a successful send, the composer remembers the selected sender address for the recipients in To, Cc and Bcc, so it can reuse that association later. For example, if you previously wrote to a shop using one of your aliases, automatic assignment can select that alias again for your next message to the same email address.
You stay in control: open From and select an existing address to use a specific identity, such as your business address. This overrides automatic assignment for the message. Automatic assignment does not mean “always use my standard address”, and it does not create a separate sender address for each recipient of a group email: everyone receives the message from the one selected From address.
Check the displayed sender before sending, especially after changing the recipient list. Once an address or preview has been selected, do not assume that editing the recipients will automatically replace it; select Automatic assignment again if you want a fresh lookup. Replies to your message go to the address you used, subject to that address’s delivery settings.
To, Cc and Bcc
Type a name or email address and select the intended suggestion, or confirm a complete address. Check each recipient chip rather than relying on the displayed name alone. Company-directory suggestions follow the available visibility and address settings.
- To: the primary recipients.
- Cc: people who should receive a visible copy.
- Bcc: people who should receive a copy without appearing in the other recipients’ Bcc list. Check the fields carefully before sending.
Use the removal control on a recipient chip to correct a mistake. Cc and Bcc buttons reveal the additional recipient fields.
Subject, priority and body
Write a concise subject that describes the purpose of the email. The priority selector offers low, normal and high priority; a high-priority label does not guarantee that someone will read or answer sooner. The small L/N/H indicator reflects that selection.
Use the formatting toolbar for text style, font, lists and indentation. More formatting exposes additional controls when space is limited. Keep essential information in the message text rather than relying only on color or images. The header collapse control gives the body more space; expand it again to review the recipients and subject.
Attachments and drafts
Choose Attach file and select the intended files. Check names and the resulting attachment list before sending. Save draft preserves work for later; reopen it from Drafts. Discard abandons the draft. Closing a composer and discarding it are different actions, so use the explicit action that matches your intent.
The title bar offers Open in own window when you need more writing space. Review any encryption or PGP status offered by the composer; ordinary external email is not automatically end-to-end encrypted just because your stored mailbox is encrypted. See PGP email encryption.
How to open the AI sidebar
- Open the mailbox or the email you want to discuss.
- Click the purple AI Assistant button in the top-right application bar, beside the notification/chat controls and your account menu. It opens the assistant on the right.
- Type in Type a message… at the bottom, or choose a quick action such as Explain, Summarize or Reply. Check the displayed “Regarding” message so you know which email supplies the context.
- Use the × in the sidebar’s top-right corner to close it and recover reading space.
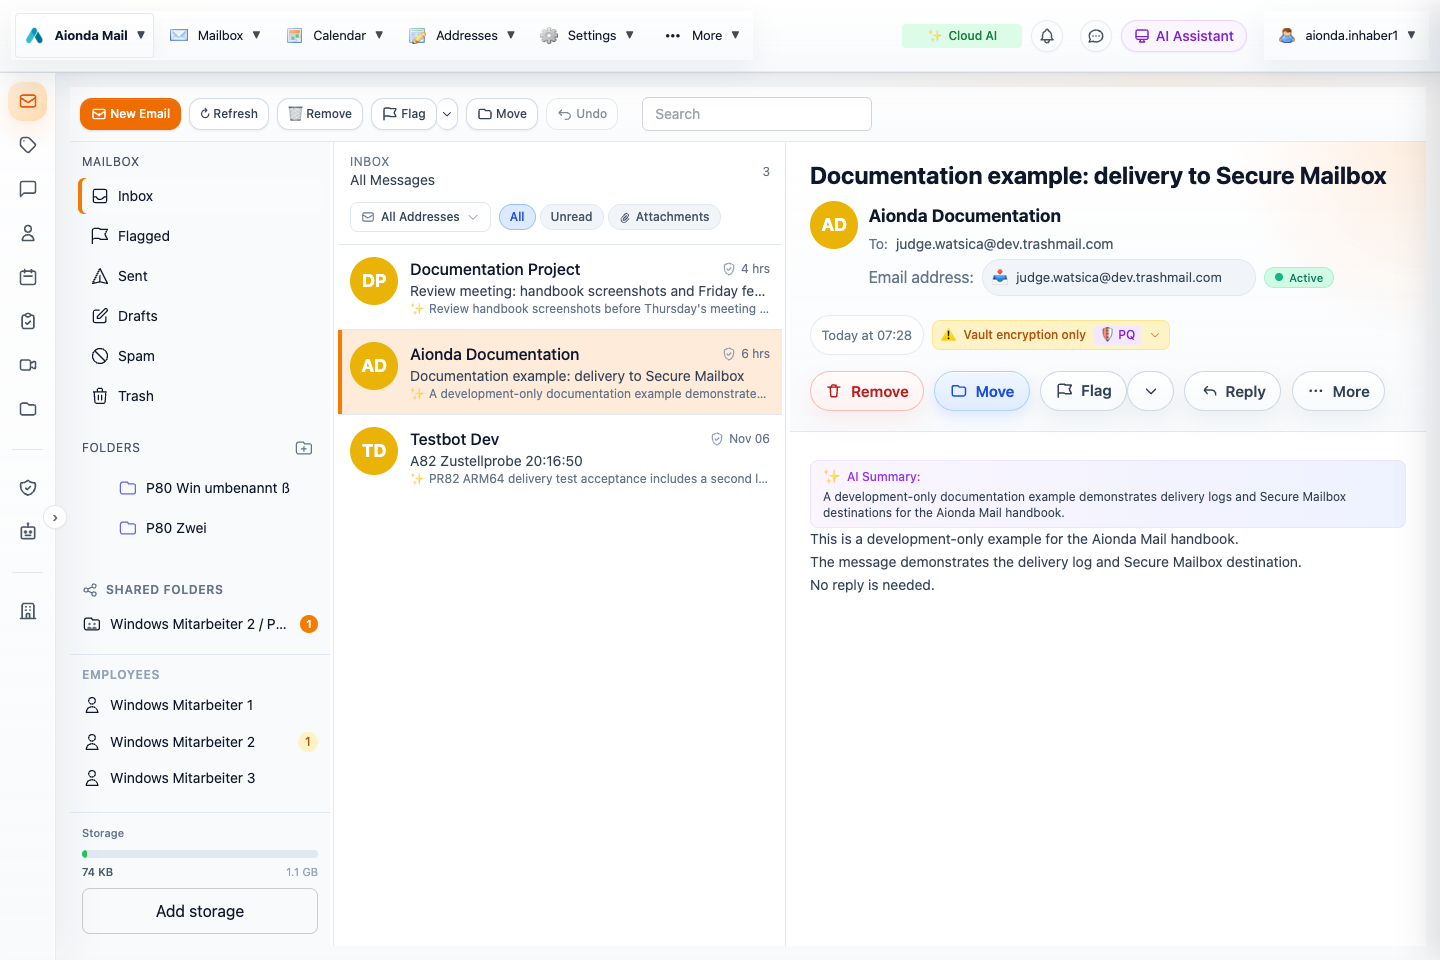
- Click AI Assistant in the top-right application bar.
Select the screenshot to open the full-size image.
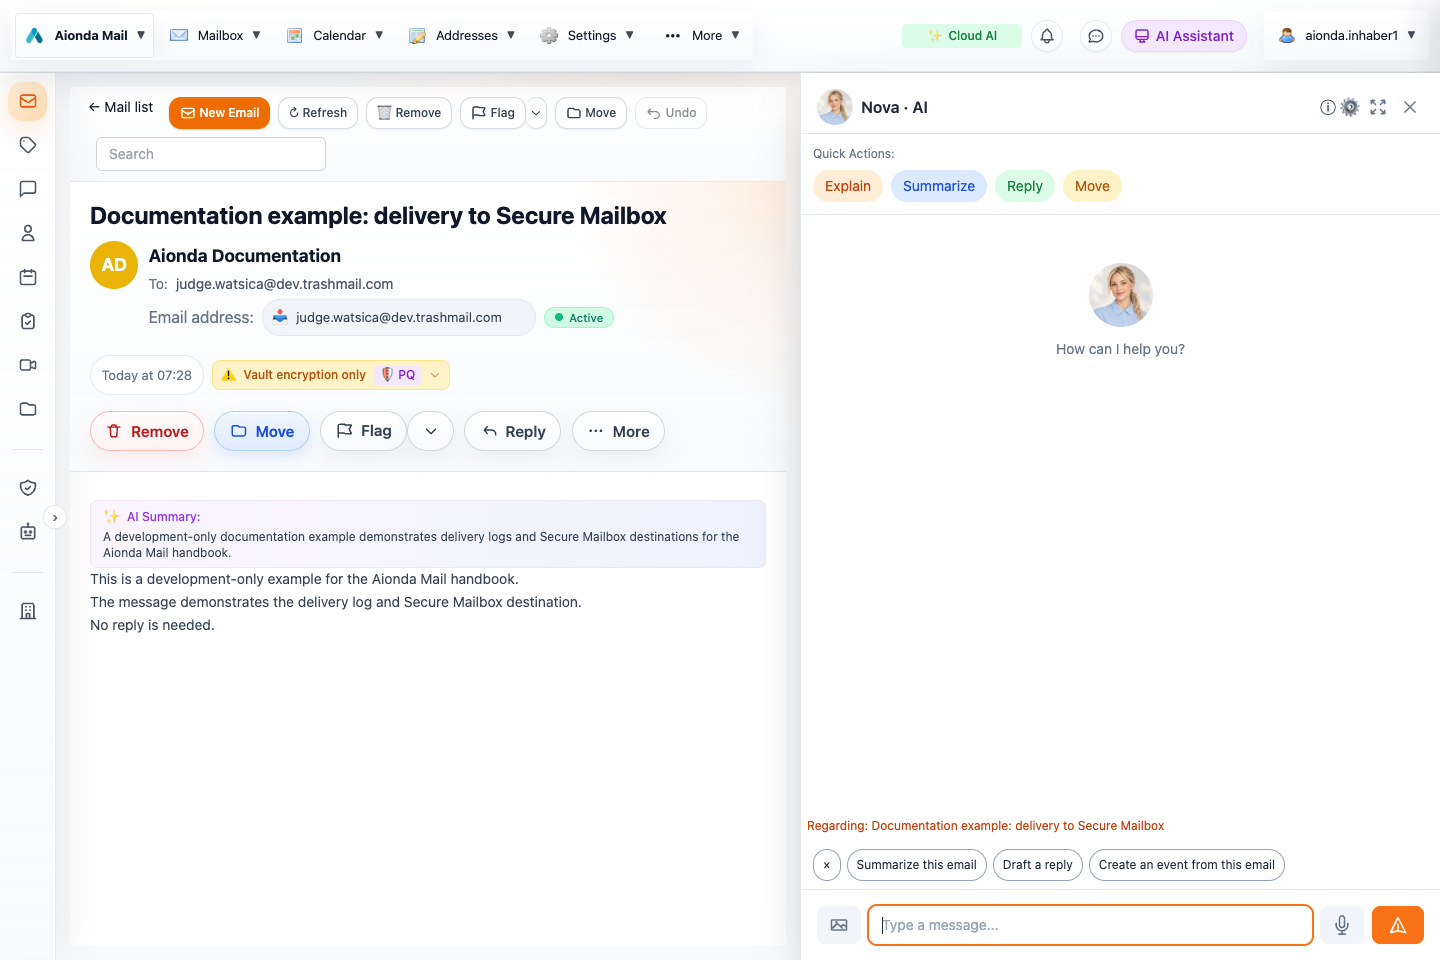
- Quick actions for the selected email.
- Check the email context, then type your request.
- Close the sidebar with ×.
Select the screenshot to open the full-size image.
The sidebar is the conversational assistant. The composer’s AI Writing Help button, described below, opens editing tools for your draft. They are different entry points. If AI is disabled, review Artificial Intelligence settings and consent first. For illustrated conversations and available actions, see AI tools.
AI Writing Help: available actions
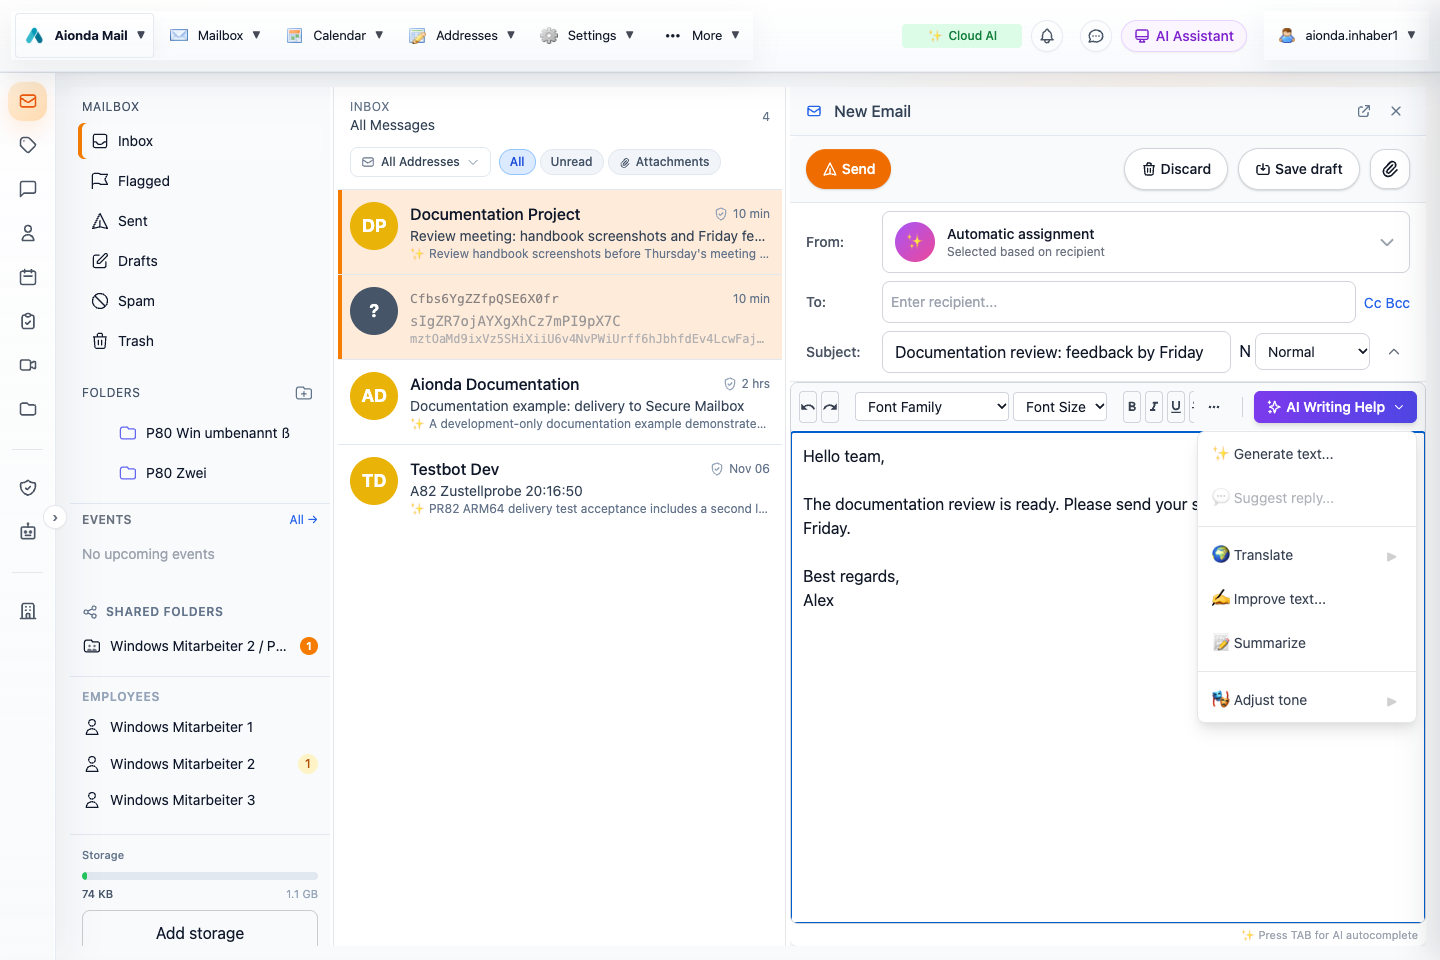
- Open AI Writing Help.
- Generate, translate, improve, summarize or adjust tone. Suggest reply is disabled in a new-message composer.
Select the screenshot to open the full-size image.
| Action | How to use it |
|---|---|
| Generate text | Describe the email you want. Choose style and language, generate a preview, then Apply it where you are writing. |
| Suggest reply | Available in a reply composer. Uses the original message as context to propose an answer; check facts and commitments before applying. |
| Translate | Select the passage first, then choose a target language. Review the translation before applying. |
| Improve text | Select text to improve wording, grammar and clarity. Review the proposed replacement and optional subject. |
| Summarize | Select the text to shorten. Check that essential facts, dates and conditions survive. |
| Adjust tone | Select text, then choose a tone such as formal, friendly, short, detailed, business, legal/formal or customer service. Review the changed wording in the editor. |
Select text before translating, improving, summarizing or changing tone. These actions operate on the selected passage, helping protect an unrelated signature or quoted original. Generate text inserts new material at the cursor or appends it when the cursor is outside the editor.
The translation menu offers German, English, French, Spanish, Italian, Portuguese (Portugal), Portuguese (Brazil), Dutch and Polish. The generation dialog currently has its own language selector; use the options actually shown there.
Example: generate a friendly project update
- Choose AI Writing Help → Generate text.
- Enter a concrete brief, for example: “Write a short friendly email to the project team. The documentation review is ready. Ask for screenshot feedback by Friday. Do not invent a meeting date. Sign as Alex.”
- Choose Friendly and English, then Generate.
- Review the proposed body and subject. Enable Apply subject if you want to replace the current subject.
- Use the follow-up field to request a specific adjustment, or Start over to regenerate.
- Choose Apply to insert the result. Review the actual composer again and add any missing signature or details.
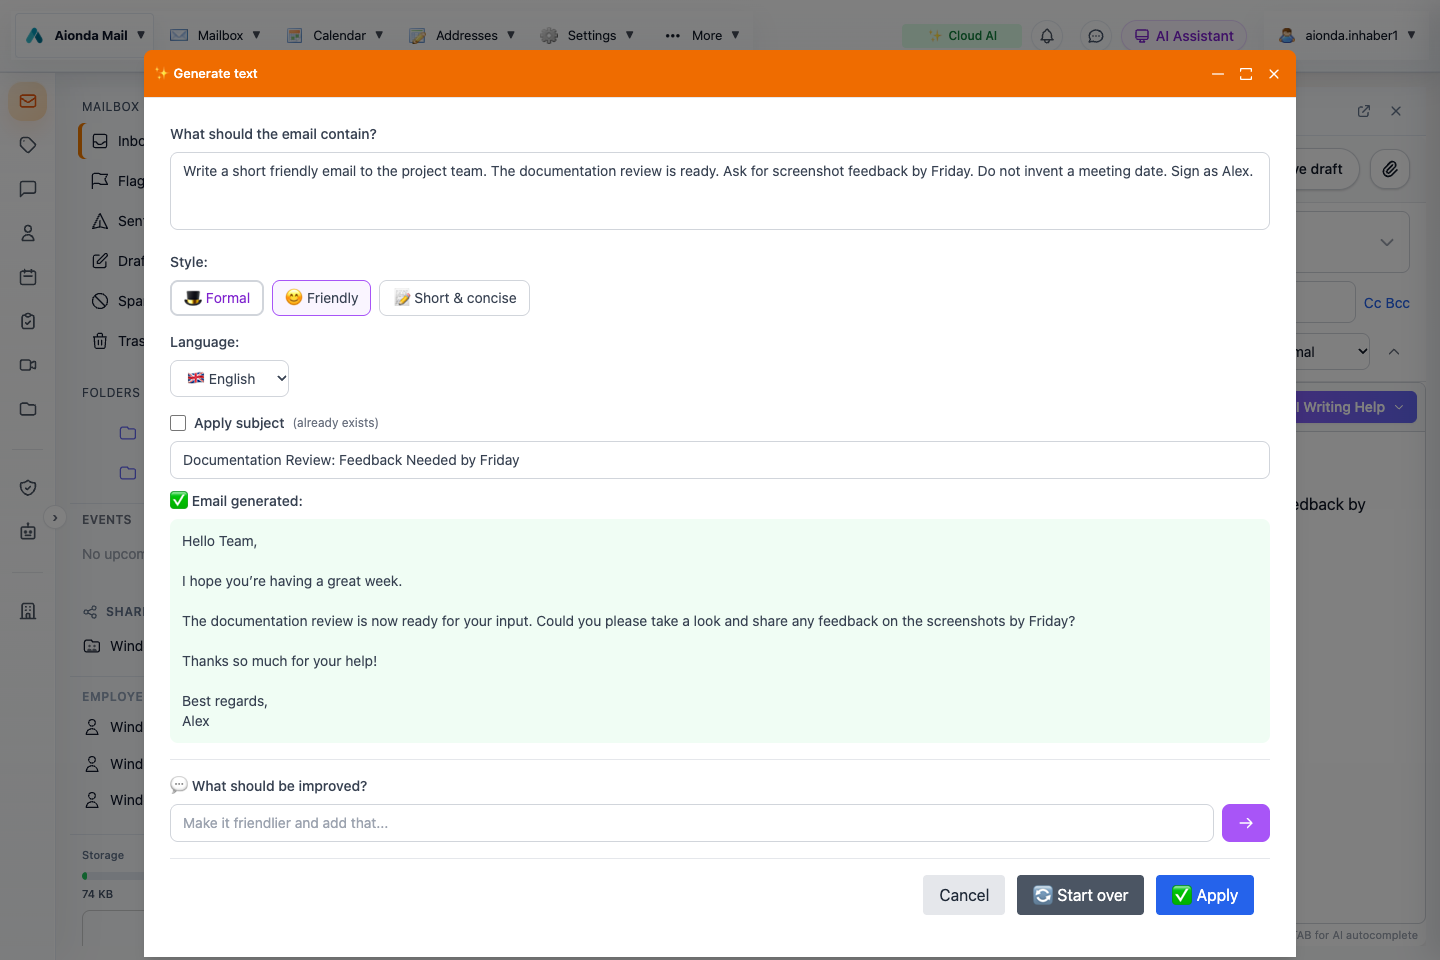
- Give a specific brief and select style and language.
- Review the suggested subject and email text.
- Refine the result or Apply it to the composer; Apply does not send.
Select the screenshot to open the full-size image.
Check the generated result against your brief, including the signature, deadline and intended recipients. Applying a result does not send the email.
AI autocomplete
When the editor offers “Press TAB for AI autocomplete”, press Tab to request a suggestion. Press Tab again to accept the displayed suggestion or highlighted choice. Read the inserted continuation; the model may make assumptions that were not in your message. You can continue typing or edit the result manually.
Final review and Send
- Check From, every recipient and any Cc/Bcc fields.
- Check the subject, dates, amounts, promises and attachments.
- Review AI wording and the displayed encryption status.
- Choose Send only when the complete message is ready.
Composer AI follows your AI mode and consent settings. Aionda recommends its more powerful Cloud AI infrastructure; supported local text AI can be selected instead. See AI settings.